Introduction to Free-Form Crochet

Ditch the patterns, be creative and have a blast!

As an Amazon associate I earn from qualified purchases.  Links at the end.

Pot holders are a great way to start figuring out Free-Form crochet.  Start with a basic granny square pattern.  These pot holders are made up of ch, sc, dc and tr.  ALWAYS use stitches you’re familiar with.

I think it was Paul McCartney who said

“I don’t go to therapy, I have my music and that’s my therapy”. 

I totally get it because after nearly 50 years of crocheting; crochet is MY therapy.  

As with anything that any of us may enjoy doing; my crochet abilities kept growing until my understanding and talent grew until I got to the point where I found myself  bored with the same old stitches being used in the same old order.  

I could change things up by using new fibers such as Bamboo (a SERIOUSLY advanced type of fiber to work with!), or Merino Wool. I still got bored with the easiness and needed a challenge.  I started seeking out advanced patterns wherever I could find them.   


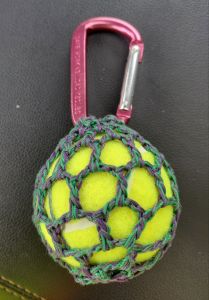
To the left is a really simple example of Free-Form Crochet.   A truck driver I work with asked me to come up with something he could throw over a load with a light rope attached for pulling heavy straps over the top to avoid damaging Wind Components.   I had an extra Tennis ball (Thanks to my road dog Dakota), an old carabiner and #10 crochet thread from my doily bag.  Using 2 strands of crochet thread, sl st and ch I made a net bag around the ball and closed it at the top by working the carabiner into the loops of the net bag.  Easy peasy!  Months later, the driver is still using it. 


With the world at my fingertips and the irritatingly quirky sound of Dial-up internet;  I found a what seemed like never  free crochet pattern websites. No more ordering pattern books from Annie’s Attic or Kirschner’s.  I even had a subscription to a small sized crochet pattern magazine, whose name completely escapes me but as they say “if you know, you know”.  *Insert here 5 minute blank stares at the wall while biting my lip in a vain attempt to remember the name of the aforementioned crochet magazine.

Although “I was wet your pants” excited about all these patterns I was able to store in a cool little folder on my dial up computer;  it was really just the same stuff over and over.  Well DAMN it!  Don’t get me wrong, I made some beautiful clothing, home decor and just general bazaar type stuff that made its way to many-a-thrift  store donation box.  

ENTER FREE FORM CROCHETING!  

These Free-Form form flowers were made with vintage buttons and   size 10 cotton crochet thread.  When choosing buttons to make flowers with, choose ones with holes big enough for the hook your using to go throught the holes.  I used a size 7 steel crochet hook for these. Stitches used:  sc, dc, tr, dbtr, ch and sl st. I used a fabric pen to draw stems and leaves.  They turned out so Cute!

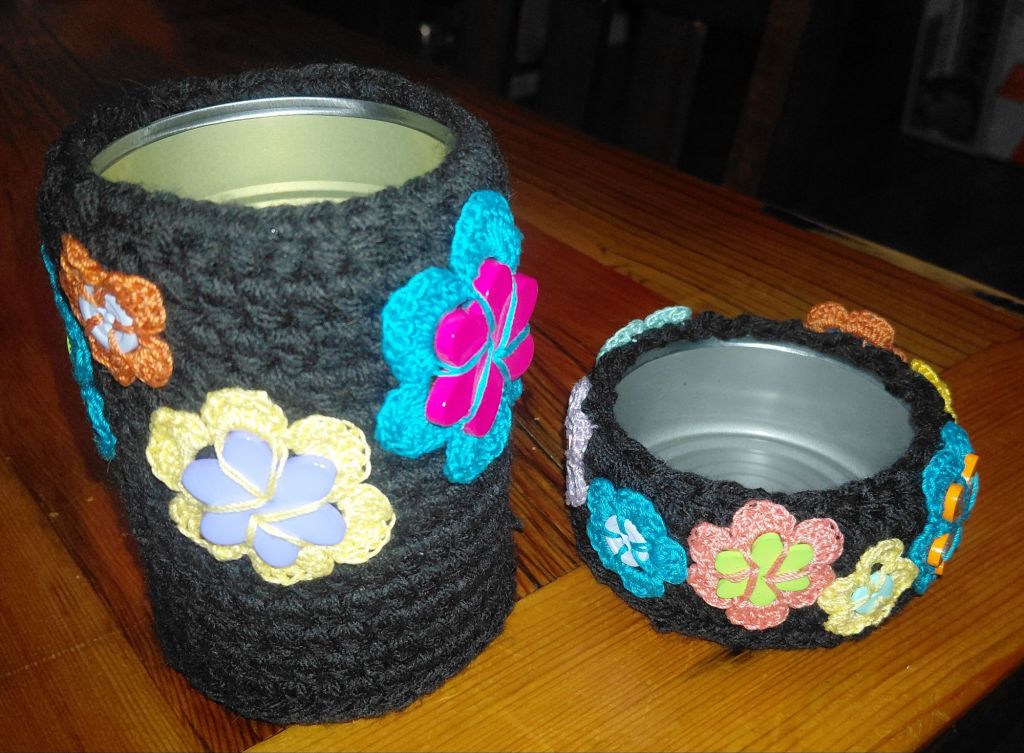
After surfing Pinterest for crochet projects I stumbled on a Free Form applique flower pin.  There was no pattern.  I thought “why wouldn’t they include the pattern?”.  I kept reading on and realized there WAS NO PATTERN!  I must have looked for a pattern within the pin for 10 minutes! Finally I started to study the crocheted flower image trying to figure out how they’d done it.  

It didn’t take me long to figure out the stitches used were dc, sc and ch.  Easy peasy!  After fudging around with these simple stitches and studying the image from the Pin, VOILA!!!! I had it!  My first try at Free-Form crochet was a complete success!  

This epiphany was such a game changer for me.  I started looking at images of crochet patterns, zooming in and dissecting them.  This meant I sometimes had to download the images and really look close at what stitches were used.  But not just the stitches, but the size of the yarn which was used too.  

I think one of the first crochet projects I tried as a kid was a potholder so I thought this would be a great little project to try for my first Free-Form project.  As I was crocheting a long I realized I had been doing Free-Form crochet off and on for years and just didn’t realize it had an actual name.  


A very basic desk set using veggie and tunafish cans.  After peeling off the paper labels and running these cans through my dishwasher, I used worsted weight yarn to crochet a sleeve around each can using sc.   When I got them tall enough to be just above the edge of the can I used a yarn needle and wove worsted weight yarn around the top, pulled on it a bit to go over the edge of the can, tied it off and tucked the ends of the yarn down in between the can and crocheted sleeve.  I keep a bag of crocheted motifs in my yarn stash and have them handy for projects just like this.  There were a bunch of button flower motifs and they worked perfectly for this project. 

What I needed was a crash course on new crochet stitches.  Pinterest has been a mind boggling experience when it comes to finding new crochet stitches and methods.  I started a sub-board titled “Stitches” within my crochet board.  At this time this board  is up to 115 pins on JUST crochet stitches.  

I see my crocheting in a whole different light.  I now get an image in my head of what I want to make and combine the stitches I know to create a finished project.  This didn’t happen overnight though.  I consider myself to be in between a moderate to experienced crocheter.  I did have to break the habit of looking at a pattern.  I keep a notebook near my crochet chair for notes on more intricate or repeat stitch patterns.  

HOLY MACKEREL!!!!  

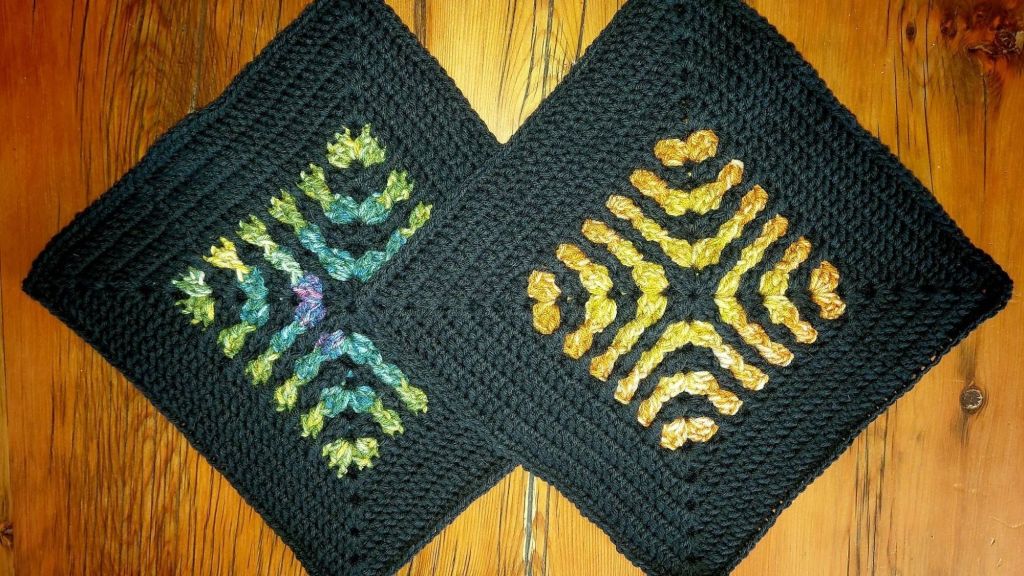
I have a few tried and true Afghan and sweater patterns in which I use the basics of the pattern and go from there. I call this “the bones” or the basic structure of the pattern.  One of those patterns is “Baby Rings”; a mile a minute baby Afghan pattern from a pattern book I bought from Annie’s Attic years ago. Except for the basic rings I have changed that pattern every time I make one.  I’ve added clusters, PC’s,  DC’s, TR’s which are pretty basic crochet stitches.  After learning stitches like Bead, larksfoot, bullion and box stitch the end product has turned from the same old, same old into intricate and eye-catching works of art.   


Above is one of my versions of the “mile a minute Baby Rings” baby afghans I’ve made.  This beautiful little girl lives in Calagry and her daddy and I worked together on an 83m wind turbine blade project going from Washington State to Hannah, Alberta in Canada.  I changed things up by using non-traditional worsted weight colors instead of pastel baby colors.  Adding cluster and popcorn stitches added texture.
 

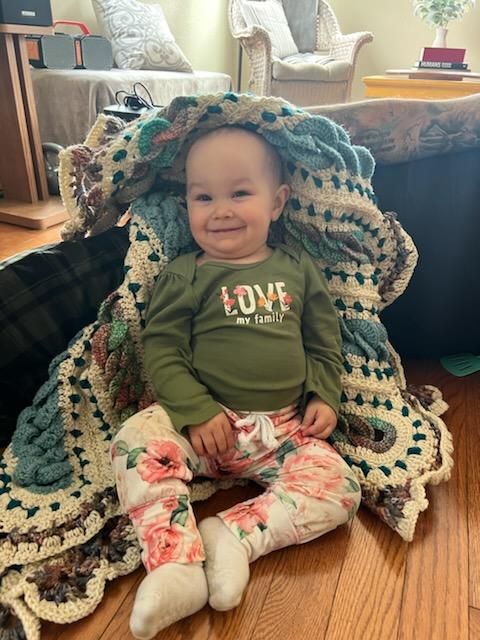
I’ve probably made a dozen of these little baby afghans and each one is different.  The only thing that stays the same are the bones of the original pattern which are the rings.  I call them “Snuggies” and make them for friends and family who are expecting.  For whatever reason babies like texture and lots of color. For me, being able to make something in which people of all ages really like and USE is the most flattering compliment they can give me!  

Take the time to learn new stitches and start easy by making swatches of Free-Form crochet.  The worst thing about this method of crochet is Frogging and this is where the practice swatches come in as a useful tool. There really aren’t any rules to follow. There aren’t any classes to take or real instructions to follow.  Dig around in your scrap yarn for a ball of old yarn, find your favorite hook and let your stitch knowledge run wild. You’ll be surprised at what you come up with.  This is such a fun and ever changing way to change up your crochet game. 

Check the examples of my Free-Form and let your mind go crazy! 

Happy Crocheting!  Later Gators,  Miss Sarah  

Links to Materials Iive used to make my Free-Form projects.  I’ve used these brands for years and stand by them 100%.  Some brands, Boye crochet hooks are the only brand I use after trying others just to donate them to stick with what works best for me. 

https://amzn.to/4e278H3

https://amzn.to/4x9gwBu

https://amzn.to/4vmRbCq

https://amzn.to/49F3phx

https://amzn.to/4wZAHlk

Pot Holders made for BIG hands

Stitches used: Slip Stitch, half double crochet, double crochet

Why are manufactured pot holders so little and thin? If you grab a hot pan out of the oven in MY kitchen, by God and sunny Jesus you are NOT gonna burn your hand!

I have a lot of scrap yarn left over from my various crochet projects. I save every bit of it too! It gets rolled up into little balls and stuffed into an old beat up Safeway paper grocery bag. I keep all sized pieces of yarn from a yard long and up. The little bitty pieces, get tied end to end and then rolled into a ball about the size of an orange. I use this ball for small projects that provide me with what I call “Instant Gratification Projects”.

Instant Gratification Projects take about as long to make as an episode of “Coach” lasts. They take zero thought and even less effort. Most all of us who these projects cause they’re done in a flash and you can look at the finished product and say to yourself “Looky what I did!?”.

Does that sound silly? Well, duh! Of course it does but the big take away is the Gratification of finishing a project. No matter how big, or in this case, how small. It may just be a scrap granny square that you add to a pile of other scrap granny squares to crochet together to make a scrap blanket with but you’ve finished it in no time! *please take into consideration all of us have projects sitting somewhere in a bag that’re only partly complete, that we’ll get to “tomorrow”.

Enter the homemade, crocheted Pot Holder. The method I use to make these is now referred to as “Free-form” crochet. I used to call it “winging it” as I’m sure most other old timers did. Free-form crochet doesn’t require a pattern no matter what you want to make. I guess this is Free-form crochet in it’s simplest form and you really don’t need a pattern to make these but you need a basic idea in your head of how you want it to look. I keep all the extra motifs, granny squares, parts of crocheted borders I’ve made up to see if I like them etc in a zip lock bag just to use for pot holders. If you don’t have any extra parts crocheted and stashed somewhere; grab your favorite hook, make a chain or circle or whatever turns your crank and just start to crochet!

Even beginners know a few stitches. It hasn’t got to be fancy, don’t chew on what or how you’re gonna do it, but here is the important thing to remember that a lot of us overlook when making these; SAFETY!

Size and Thickness *insert 12 year old giggle here*. It’s true though, when I grab for a pot holder in my kitchen, it’s to pull out a 400+ degree metal pan from the oven to get on the counter quick. I want to make sure I don’t burn my hand or my pretty counter tops.

Crochet a shape, lay it down and put your hand in the middle of it. If your fingers hang over the edge of your crocheted piece, you got a ways to go! I always make sure I have at least 2″ of space bigger than the size of my hand. I have sausage fingers, pure and simple. If it’s a horse call it a horse. Occasionally, people with bigger hands than me have to get something out of my oven. Mostly I worry about a man or Amazon size Lady Friend. It doesn’t matter who it is, I don’t want someone burning their hand using a pot holder that’s way too small.

There are always 2 layers to my pot holders. So after you get your first side the size and shape you want it, make another one. It doesn’t have to be the exact match of the first one. It can just be one color. Make it as close to the size of the first one as you can. After all, these are going to be used as “Trivets” too. A Trivet is something you sit on your counter to put a hot pan on. Another reason to make them good and thick.

After you get the second side done, lay one on top of the other and figure out how you want to crochet them together. In the first photo, I’ve Slip Stiched the 2 sides together on both pot holders because one side was just a smidge bigger than the other. This works out great! In the second photo, I did a single crochet stitch clear around. Both layers were close enough in size, so I simply crocheted singles through both layers.

20250202_0959062481074296094184179
Stitches used: double crochet, single crochet, slip stitch

In the photo above, I used a basic shell to crochet the 2 sides together. For the brown one on the left, I added a slip stitch row just to play around with it. As far as weaving in the ends; I insert my hook in between the 2 sides and near the middle of one side. Which side doesn’t matter. Work the hook through those sides up to where there’s a hole at the tail of the yarn. Yarn over and pull the tail in between the sides. Give your pot holder a stretch and the end of the yarn should disappear inside. If not, pull it just a little tight, snip off the end and then give it a stretch and your tail will be pulled inside the potholder. Don’t worry, I’ve not ever had one come apart on me in all the years I’ve been making these.

I work with a lot of bachelors or gentlemen who are the cooks in their homes. Every single one of them are shocked at these simple pot holders. The comments always seem geared around “it’s actually BIG enough for my hands”!

You can’t buy these in any stores, they’re easy to make and last forever. I use acrylic yarn and have not had an issue with them scorching from a hot pan. If you get “whatever” baking goo on them just pitch them in the washer/dryer and call it wonderful!

That’s it my babies! Use your imagination and as always HAVE FUN!