Pilot Car (PEVO) Lingo

“You gotta run the zipper across this bridge”, “We’re gonna have to shoo-fly this pork chop to make it around the left turn”

This is a partial list of Lingo used while piloting oversize/over dimensional loads to help out new PEVO’s who are unfamiliar with industry specific Lingo. Most of these terms are used continually by all members of an oversize crew including the truck driver, front door/pole car, back door and steerman.

PILOT CAR LINGO

Every industry has its own lingo and Oversize/Over dimensional Pilot Car Drivers are no different.  This mostly incomplete list will give the Pilot Car Driver, AKA Escort, AKA PEVO (Pilot Escort Vehicle Operator) a good working knowledge of commonly used Oversize terms used to perform your duties as a Pilot Car driver along with some lesser used terms.

There are no training classes per se.  Other than the instruction and testing you’ll get when you go through your PEVO certification course; this industry is pretty much all “school of hard knocks” e.g. learning as you go along. This glossary of Pilot Car terms is to help Newbie Pilots.  To help them navigate their first few trips until saying these well recognized terms not only helps you to familiarize yourself but it will help you to become a valuable part of any Oversize team.

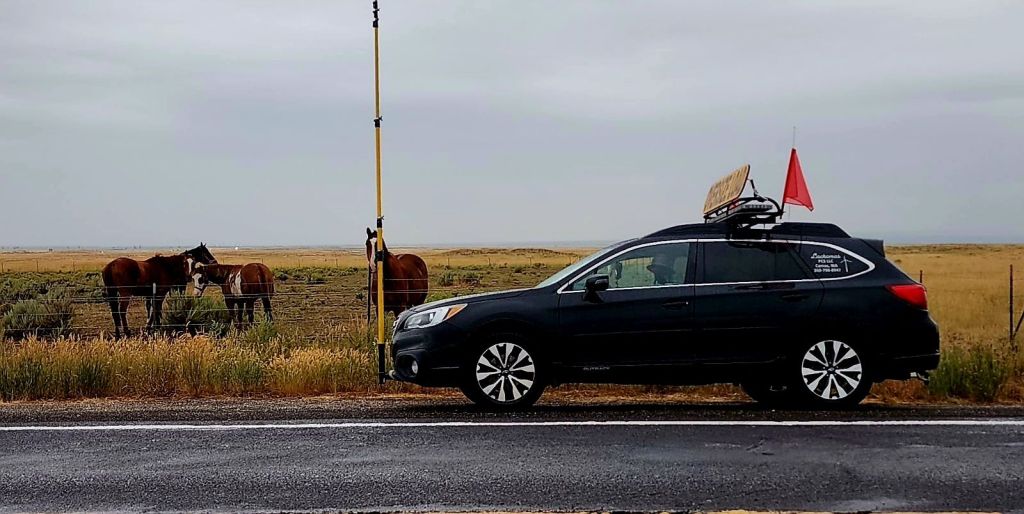
FOUR Any 4 wheeled passenger vehicle driven by a regular motorist.

TAG A trailer being towed behind a vehicle.  e.g., “4 with a tag on the shoulder”

ALLIGATOR More commonly called a GATOR.  These are shredded pieces of tires laying in or along the side of the road.  *When the tread is facing up, they resemble the backs of alligators.

MUSTARD The yellow striping to the left of lane 1. *The inside or left lane.

FOG LINE The white line at the right edge of the outside right lane (on multiple lane roads) or at the right side of the lane you are traveling in.

ZIPPER The broken lines separating the lanes or 2 way traffic.

UP Used by the Chase car or Steerman to let the driver know a vehicle is going to pass the load. e.g. “4 and a tag “up”.

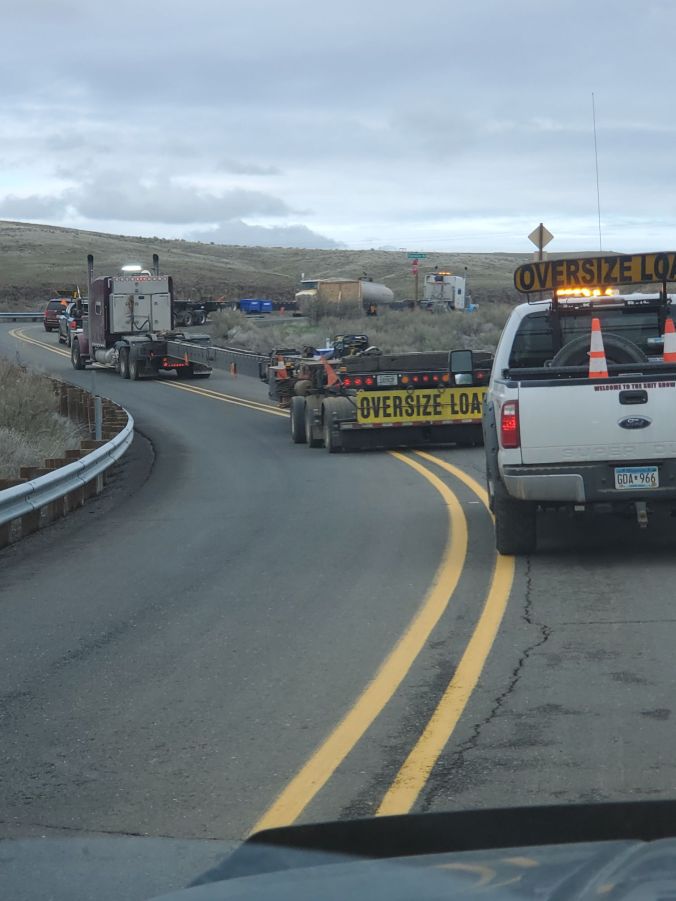
18 A Semi truck. Regular sized semi tractor/trailers have 18 wheels.

WIGGLE- WAGON    A semi with 2 trailers.  In Canada these are referred to as “B-Trains”.

PARKING LOT    A semi that hauls passenger vehicles.

BACK DOOR    Another name for a Chase Pilot Car. Always at the back of the load. Blocks traffic in lanes when the driver has to change lanes, letting your driver know of approaching traffic that may interfere with the safe travel of the load.  The back door also calls out distances of the back axles to the edge of the shoulder on turns when there is no Steerman.  *Ask your driver what he/she wants called out.

STEERMAN Also a Chase but their main responsibility as the Steerman is always being located at the back of the load when rolling to allow for Steering the load. Their duties also include helping to Load/Unload. 

LEAD Also known  as the FRONT DOOR Pilot Car.  Duties include reading the permit for routing and pertinent information for the load, instructing the driver/team on turns, warning the driver of obstacles whether in the lane of travel or on the shoulder in which the load has to change lanes or maneuver to get around, accidents, animals entering the roadway etc.  *Always ask  your driver what they want called out.  

WEIGH STATION   Also known as a “SCALE or CHICKEN SHACK”. Normally all oversize loads will have to enter the scale unless it’s on your permit to bypass it due to permanent closure or construction. You’ll see an illuminated red/green  sign with “open” or “closed”.  It’ll be about a mile before the scale.  Whether the sign reads open or closed, call it out to your team. When you enter,  DO NOT DRIVE ACROSS  the scale.  There’ll be a by-pass lane usually to the left of the scale lane, use this lane for going through the scale. 

PORK CHOP  Pork chops are small islands that help separate oncoming turn lanes from other turning lanes.  They’re found at intersections and usually have a stop sign on them.  These small islands look like pork chops.

SHOO-FLY This maneuver involves making a wrong-way turn into the oncoming traffic lane when the turn is too tight or there are obstacles keeping you from making the turn the lane you are traveling in.  This often involves an intersection with a PORK CHOP.

GYPSY WAGON A RV or towable camper rig.

SPLITTING LANES   This maneuver involves your driver to drive over the top of the ZIPPER separating 2 lanes.  Wider loads may choose to do this in heavy traffic. *This is also called RUNNING THE ZIPPER.

CENTER UP This maneuver is literally what it says.  It’s used when going through narrower portions of the roadway or across bridges.

OUT This term is specifically for LEAD/POLE CARS    “You’re too far OUT”, meaning too far away from the load.  “You need to get OUT further”.  Meaning you’re too close to the load.

DOWN THE BELLY Meaning down the center of the lane you are traveling in.  “metal debris “down the belly

As I said before, this is by no means a complete list of the lingo used in the Oversized/Over dimensional industry.  I can imagine some of these terms sound silly or make no sense to a new pilot but believe me, before you know it you’re going to be using them in normal conversations you have while on the job and may even slip and use them when talking to friends or family while explaining your day as a PEVO.  Piloting is not an exact science and talking to 5 different pole cars about how to perform their duties will give you 5 different answers.  

My best advice to a Newbie is to take everything in;  pretty soon you’ll figure out what is valuable information and what isn’t.  NO QUESTION IS A DUMB QUESTION!  

image000000(7)4433203676251650895
Curious Horses checking me out in Dubois, Idaho

Pot Holders made for BIG hands

Stitches used: Slip Stitch, half double crochet, double crochet

Why are manufactured pot holders so little and thin? If you grab a hot pan out of the oven in MY kitchen, by God and sunny Jesus you are NOT gonna burn your hand!

I have a lot of scrap yarn left over from my various crochet projects. I save every bit of it too! It gets rolled up into little balls and stuffed into an old beat up Safeway paper grocery bag. I keep all sized pieces of yarn from a yard long and up. The little bitty pieces, get tied end to end and then rolled into a ball about the size of an orange. I use this ball for small projects that provide me with what I call “Instant Gratification Projects”.

Instant Gratification Projects take about as long to make as an episode of “Coach” lasts. They take zero thought and even less effort. Most all of us who these projects cause they’re done in a flash and you can look at the finished product and say to yourself “Looky what I did!?”.

Does that sound silly? Well, duh! Of course it does but the big take away is the Gratification of finishing a project. No matter how big, or in this case, how small. It may just be a scrap granny square that you add to a pile of other scrap granny squares to crochet together to make a scrap blanket with but you’ve finished it in no time! *please take into consideration all of us have projects sitting somewhere in a bag that’re only partly complete, that we’ll get to “tomorrow”.

Enter the homemade, crocheted Pot Holder. The method I use to make these is now referred to as “Free-form” crochet. I used to call it “winging it” as I’m sure most other old timers did. Free-form crochet doesn’t require a pattern no matter what you want to make. I guess this is Free-form crochet in it’s simplest form and you really don’t need a pattern to make these but you need a basic idea in your head of how you want it to look. I keep all the extra motifs, granny squares, parts of crocheted borders I’ve made up to see if I like them etc in a zip lock bag just to use for pot holders. If you don’t have any extra parts crocheted and stashed somewhere; grab your favorite hook, make a chain or circle or whatever turns your crank and just start to crochet!

Even beginners know a few stitches. It hasn’t got to be fancy, don’t chew on what or how you’re gonna do it, but here is the important thing to remember that a lot of us overlook when making these; SAFETY!

Size and Thickness *insert 12 year old giggle here*. It’s true though, when I grab for a pot holder in my kitchen, it’s to pull out a 400+ degree metal pan from the oven to get on the counter quick. I want to make sure I don’t burn my hand or my pretty counter tops.

Crochet a shape, lay it down and put your hand in the middle of it. If your fingers hang over the edge of your crocheted piece, you got a ways to go! I always make sure I have at least 2″ of space bigger than the size of my hand. I have sausage fingers, pure and simple. If it’s a horse call it a horse. Occasionally, people with bigger hands than me have to get something out of my oven. Mostly I worry about a man or Amazon size Lady Friend. It doesn’t matter who it is, I don’t want someone burning their hand using a pot holder that’s way too small.

There are always 2 layers to my pot holders. So after you get your first side the size and shape you want it, make another one. It doesn’t have to be the exact match of the first one. It can just be one color. Make it as close to the size of the first one as you can. After all, these are going to be used as “Trivets” too. A Trivet is something you sit on your counter to put a hot pan on. Another reason to make them good and thick.

After you get the second side done, lay one on top of the other and figure out how you want to crochet them together. In the first photo, I’ve Slip Stiched the 2 sides together on both pot holders because one side was just a smidge bigger than the other. This works out great! In the second photo, I did a single crochet stitch clear around. Both layers were close enough in size, so I simply crocheted singles through both layers.

20250202_0959062481074296094184179
Stitches used: double crochet, single crochet, slip stitch

In the photo above, I used a basic shell to crochet the 2 sides together. For the brown one on the left, I added a slip stitch row just to play around with it. As far as weaving in the ends; I insert my hook in between the 2 sides and near the middle of one side. Which side doesn’t matter. Work the hook through those sides up to where there’s a hole at the tail of the yarn. Yarn over and pull the tail in between the sides. Give your pot holder a stretch and the end of the yarn should disappear inside. If not, pull it just a little tight, snip off the end and then give it a stretch and your tail will be pulled inside the potholder. Don’t worry, I’ve not ever had one come apart on me in all the years I’ve been making these.

I work with a lot of bachelors or gentlemen who are the cooks in their homes. Every single one of them are shocked at these simple pot holders. The comments always seem geared around “it’s actually BIG enough for my hands”!

You can’t buy these in any stores, they’re easy to make and last forever. I use acrylic yarn and have not had an issue with them scorching from a hot pan. If you get “whatever” baking goo on them just pitch them in the washer/dryer and call it wonderful!

That’s it my babies! Use your imagination and as always HAVE FUN!